Sunday, May 26, 2024

How to focus bird photography?


How to focus bird photography

How to focus bird photography?

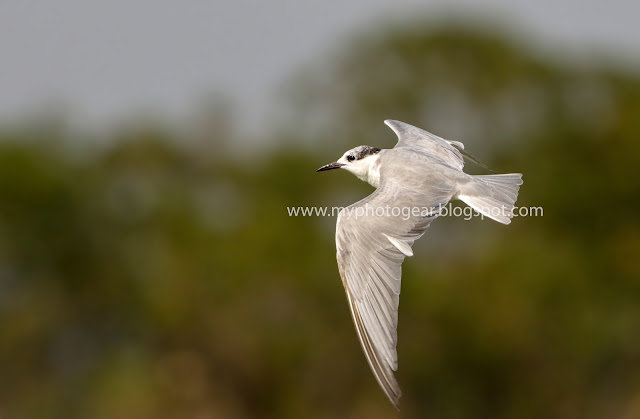
Capturing sharp and focused bird photographs requires a combination of proper equipment, technique, and patience. Here are some tips to help you focus effectively:

Use a Fast Autofocus System: Invest in a camera body with a fast and accurate autofocus system, especially one with advanced features like predictive autofocus, which can track moving subjects.

Select the Right Autofocus Mode: For birds in motion, use continuous autofocus (AI Servo for Canon, AF-C for Nikon) to track the subject as it moves. For stationary birds, single autofocus (One Shot for Canon, AF-S for Nikon) is suitable.

Choose the Correct Focus Point: Set your camera to use a single autofocus point or a small group of points to ensure precise focusing on the bird, particularly the eyes—the most critical part of a bird portrait.

Pre-focus on a Perch: If you know where the bird will land or frequently visit, pre-focus your lens on that spot and wait for the bird to enter the frame.

Anticipate Movement: Study bird behavior to anticipate where they will go next, allowing you to pre-focus and be ready to capture the action.

Use Back-Button Focus: Assign autofocus activation to a separate button (usually AF-On) on the back of your camera. This allows you to separate focusing from shutter release, giving you more control over when to focus.

Manual Focus Override: In situations where autofocus struggles, such as busy backgrounds or low light, consider switching to manual focus and fine-tuning it yourself.

Shoot at Higher Shutter Speeds: Birds are often in motion, so using a faster shutter speed helps freeze their movement and reduces the chance of motion blur. This is especially important for birds in flight.

Consider Depth of Field: Depending on your artistic vision, choose an appropriate aperture to control depth of field. A wider aperture (lower f-stop number) can create a pleasing background blur, but ensure that the bird's important features remain sharp.

Practice Patience and Persistence: Bird photography requires a lot of waiting and observation. Keep practicing, and don't get discouraged by missed shots. Over time, you'll develop the skills to consistently capture sharp and focused images of birds.

Remember, achieving sharp focus in bird photography takes practice and experimentation. Keep honing your skills, and you'll gradually improve your ability to capture stunning bird images.


Monday, May 20, 2024

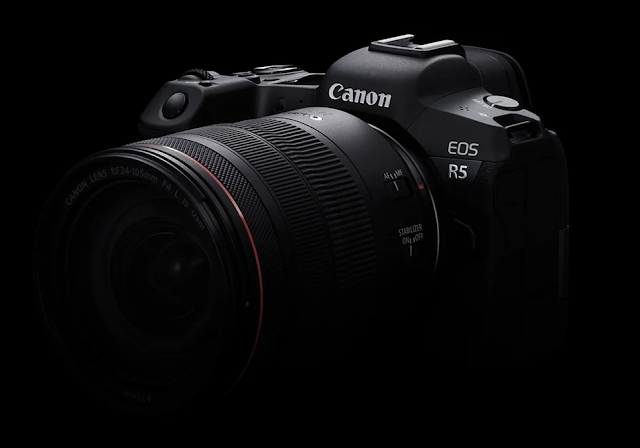
Canon EOS R5 II Specs


The Canon EOS R5 Mark II hasn't been officially announced yet, but there are rumors circulating about its specs. Here's what we know so far (keep in mind these are rumors):

Canon EOS R5 II Specs

Sensor: A 45-megapixel stacked CMOS sensor is expected, potentially with faster readout than the EOS R3.

Image Stabilization: In-body image stabilization (IBIS) is a given.

Shutter: There are conflicting rumors. Some sources say it might ditch the mechanical shutter entirely, while others suggest it will have both electronic and mechanical options.

Burst Rate: A high burst rate is anticipated, possibly reaching 60fps.

Video: 8K RAW and 4K at 120fps are rumored video capabilities.

Autofocus: Improved AI autofocus features, including Eye AF II, are expected.

Screen: A 3.2” OLED articulating touchscreen is likely.

Processor: A new DIGIC processor (name unknown) is expected.

Timing:  Mid-summer 2024 is a possibility for announcement and release.


These are all rumors, so take them with a grain of salt. It's best to wait for the official announcement from Canon to get the full picture.

Monday, May 13, 2024

How can a beginner start photography?


Starting photography as a beginner can be exciting and rewarding! Here are some steps to get you going:

Get Familiar with Your Camera: Whether you're using a smartphone, a point-and-shoot, or a DSLR, take some time to learn about its basic functions. Understand how to adjust settings like aperture, shutter speed, ISO, and focus.

Learn the Basics of Composition: Composition is key to creating visually appealing photos. Learn about concepts like the rule of thirds, leading lines, symmetry, and framing. Practice composing your shots with these principles in mind.

Experiment with Different Subjects: Start by photographing a variety of subjects such as landscapes, portraits, still life, architecture, or street scenes. This will help you discover what interests you the most and what you enjoy photographing.

Understand Lighting: Lighting plays a crucial role in photography. Learn how different types of light (natural light, artificial light, soft light, harsh light) affect your photos. Experiment with shooting during different times of the day to understand how light changes.

Study Other Photographers' Work: Look at the work of established photographers to get inspiration and learn from their techniques. Analyze their composition, use of light, and storytelling to understand what makes their photos stand out.

Practice Regularly: Like any skill, photography improves with practice. Make it a habit to take photos regularly, even if it's just in your everyday surroundings. Challenge yourself to try new techniques and experiment with different settings.

Join Photography Communities: Joining online forums, social media groups, or local photography clubs can provide valuable feedback, support, and inspiration. You can also learn from others and share your own experiences.

Edit Your Photos: Post-processing can enhance your photos and bring out their full potential. Learn basic editing techniques using software like Adobe Lightroom or Photoshop, or even free apps on your smartphone.

Don't Be Afraid to Make Mistakes: Making mistakes is part of the learning process. Embrace them, learn from them, and use them to improve your skills.

Have Fun: Most importantly, enjoy the process of learning and creating. Photography is a creative outlet that allows you to express yourself and capture moments in time. So, have fun exploring and discovering your unique style!

Understanding composition in photography


Understanding composition in photography is like learning the language of visual storytelling. It's about how elements within a photograph are arranged to create a compelling and balanced image. Here are some key principles:

Rule of Thirds: Mentally divide your image into thirds both horizontally and vertically, and place key elements along these lines or at their intersections. This helps create balance and interest.

Leading Lines: Use lines within your image to lead the viewer's eye into the photo. These lines can be literal, like roads or fences, or implied, like the gaze of a person in the frame.

Symmetry and Patterns: Symmetry can be visually pleasing, so look for opportunities to center your subject or create mirrored compositions. Patterns, when repeated, can also add visual interest to your photo.

Depth: Adding elements in the foreground, middle ground, and background can create a sense of depth and dimensionality in your photos, making them more engaging.

Point of View: Experiment with different angles and perspectives to find the most interesting way to capture your subject. Sometimes shooting from a low angle or from above can completely change the feel of an image.

Negative Space: Don't feel like every inch of your photo needs to be filled with something. Negative space, or empty areas in your composition, can help draw attention to your subject and create a sense of simplicity or calm.

Foreground Interest: Including interesting elements in the foreground can add depth and context to your photo, guiding the viewer's eye into the image.

Balance and Symmetry: Strive for balance in your composition, whether it's symmetrical or asymmetrical. Pay attention to the visual weight of objects within the frame to achieve balance.

Framing: Use natural elements like archways, door frames, or tree branches to frame your subject and draw attention to it.

Rule of Odds: In general, an odd number of subjects in a photo tends to be more visually appealing than an even number. This creates a sense of imbalance, which can be interesting to the viewer.

Remember, these principles are just guidelines, not hard and fast rules. Experimentation and practice are key to developing your compositional skills and finding your own style as a photographer.

Please don't use these images anywhere without permission.

Best wedding photographers for beginners


Best wedding photographers for beginners

For beginner wedding photographers, it's essential to find photographers who not only produce high-quality work but also offer educational resources and support to help you grow in your skills. Here are a few renowned wedding photographers known for their expertise and willingness to share knowledge: Jasmine Star: Jasmine Star is not only an exceptional photographer but also an educator. She offers online courses, webinars, and free resources on her website to help aspiring wedding photographers. Susan Stripling: Known for her timeless and elegant wedding photography, Susan Stripling also offers workshops and online mentoring to help photographers improve their craft. Katelyn James: Katelyn James is a wedding photographer known for her bright and airy style. She offers online courses and resources tailored to beginner photographers, covering everything from shooting techniques to business strategies. Nikon School: Nikon School offers workshops and online courses specifically designed for wedding photographers using Nikon gear. Even if you don't shoot with Nikon, many of the concepts and techniques covered are applicable across different camera brands. Canon Live Learning: Similar to Nikon School, Canon Live Learning provides workshops and online resources for wedding photographers using Canon equipment. These resources cover various topics, including lighting, posing, and post-processing. CreativeLive: CreativeLive offers a wide range of online courses taught by industry experts, including wedding photography-specific classes. It's a great platform to learn from multiple instructors and explore different styles and techniques. Remember, in addition to learning from established photographers, practice and experimentation are crucial for growth as a wedding photographer. Don't be afraid to experiment with different techniques and styles to find what works best for you.


Sunday, May 12, 2024

Which camera is best photography for beginners?


Which camera is best photography for beginners?

Choosing the best camera for beginners depends on several factors, including budget, preferences, and intended use. Here are a few options across different types of cameras: Entry-Level DSLRs (Digital Single Lens Reflex): Canon EOS Rebel T7 (also known as EOS 2000D): It offers a good balance of features, image quality, and affordability. Nikon D3500: Known for its user-friendly interface, excellent image quality, and long battery life, making it great for beginners. Pentax K-70: Offers weather-sealing and in-body image stabilization, which are advanced features usually found in higher-end models.

Mirrorless Cameras: Sony Alpha a6000: A compact mirrorless camera with excellent autofocus performance and image quality, ideal for beginners. Fujifilm X-T200: Known for its retro design, easy-to-use interface, and high-quality images, it's suitable for beginners transitioning from smartphones or compact cameras. Canon EOS M50: Offers a good balance of features, compact size, and compatibility with Canon's extensive lens lineup.

Compact Cameras: Canon PowerShot G7 X Mark III: A high-quality compact camera with a flip-up screen, ideal for vlogging and general photography. Sony Cyber-shot RX100 series: Known for its compact size, excellent image quality, and advanced features, making it suitable for beginners who want a pocket-sized camera with DSLR-like capabilities.

Consider factors such as budget, ease of use, portability, and desired features when choosing a camera for beginners. It's also essential to factor in the availability of lenses and accessories for future upgrades as you progress in your photography journey.

Understand the exposure triangle


The exposure triangle is a fundamental concept in photography that helps you understand how three main settings—aperture, shutter speed, and ISO—interact to control the exposure of your photos.

Aperture: Aperture refers to the size of the opening in the lens through which light passes into the camera. It's measured in f-stops. A smaller f-stop number (e.g., f/2.8) indicates a larger aperture, allowing more light to enter the camera. Conversely, a larger f-stop number (e.g., f/16) indicates a smaller aperture, letting in less light. Aperture not only controls the amount of light but also affects depth of field. A larger aperture (smaller f-stop number) results in a shallow depth of field, while a smaller aperture (larger f-stop number) increases the depth of field, keeping more of the scene in focus.

Shutter Speed: Shutter speed refers to the amount of time the camera's shutter remains open, allowing light to reach the camera sensor. It's measured in seconds or fractions of a second. A faster shutter speed (e.g., 1/1000s) lets in less light and freezes motion, which is useful for capturing fast-moving subjects or preventing camera shake. A slower shutter speed (e.g., 1/30s) allows more light to enter the camera and can create motion blur, conveying a sense of movement in the photo.

ISO: ISO measures the sensitivity of the camera sensor to light. A lower ISO number (e.g., ISO 100) makes the sensor less sensitive to light, requiring more light to achieve a properly exposed image. A higher ISO number (e.g., ISO 1600) increases the sensor's sensitivity to light, allowing you to shoot in low-light conditions or use faster shutter speeds. However, higher ISO settings can introduce digital noise or graininess into the image, so it's essential to find the right balance between ISO sensitivity and image quality.

Balancing these three settings is crucial for achieving a well-exposed photograph. For example, if you're shooting in low light, you may need to widen the aperture (smaller f-stop number), use a slower shutter speed, or increase the ISO to compensate for the lack of light. Conversely, if you're shooting in bright sunlight, you might need to use a smaller aperture (larger f-stop number), faster shutter speed, or lower ISO to prevent overexposure.

Understanding the exposure triangle allows you to control the exposure of your photos creatively and effectively in various lighting conditions and shooting situations. Experimenting with different combinations of aperture, shutter speed, and ISO will help you develop your photographic skills and achieve the desired look for your images.

Please don't use these images anywhere without Our permission.

7 elements of photography


7 elements of photography

While there isn't a universally agreed-upon set of "7 elements of photography" like there is for the elements of art (such as line, shape, form, color, texture, value, and space), there are several fundamental elements that are commonly discussed in photography education and critique. 

These include:

Light: Light is the most critical element in photography. It not only illuminates the scene but also affects mood, tone, contrast, and shadow. Understanding how to manipulate and work with light is essential for creating compelling photographs.

Composition: Composition refers to how elements are arranged within the frame of a photograph. This includes factors like the rule of thirds, leading lines, framing, symmetry, and balance. A strong composition can draw the viewer's eye and convey the photographer's intended message.

Color: Color can significantly impact the mood and atmosphere of a photograph. It includes considerations of color theory, such as complementary, analogous, or monochromatic color schemes. Additionally, the intensity, saturation, and temperature of colors play important roles in photographic composition.

Contrast: Contrast refers to the variation in tones between the lightest and darkest parts of an image. High contrast can create drama and impact, while low contrast can evoke a sense of softness or subtlety. Understanding how to control contrast through lighting, exposure, and post-processing is crucial for creating visually engaging images.

Texture: Texture adds depth and tactile quality to photographs. It refers to the surface characteristics of objects and how they are rendered in the image. Photographers often use lighting and focus techniques to emphasize texture and create visual interest.

Pattern: Patterns are repetitive elements within an image that can create rhythm and harmony. Recognizing and capturing patterns can lead to visually striking compositions, whether they occur in nature, architecture, or human-made objects.

Perspective: Perspective refers to the point of view from which a photograph is taken. It includes considerations of angle, distance, and lens choice. By manipulating perspective, photographers can alter the viewer's perception of space, scale, and depth within the image.

These elements are interconnected and often work together to create compelling photographs. While not an exhaustive list, they provide a framework for understanding and discussing the visual aspects of photography.


Saturday, May 11, 2024

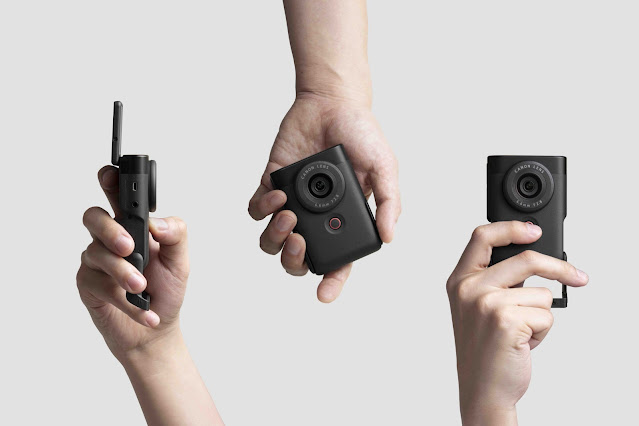
Canon PowerShot V10


Canon's PowerShot lineup typically includes compact digital cameras with varying features, including zoom capabilities, sensor size, and resolution.

However, I can provide some general information about what you might expect from a Canon PowerShot V10, assuming it follows the conventions of Canon's PowerShot series:

Design: The Canon PowerShot V10 would likely feature a compact and lightweight design, making it suitable for everyday use and travel photography. It would likely have a comfortable grip and intuitive button layout for easy handling.

Sensor: The sensor size would likely be smaller compared to interchangeable lens cameras, such as those in the EOS lineup. Canon's PowerShot cameras typically feature 1-inch or smaller sensors, offering a good balance between image quality and portability.

Zoom Lens: Canon PowerShot cameras often come with built-in zoom lenses with various focal lengths. The PowerShot V10 might feature an optical zoom range of around 10x to 20x, allowing for versatility in framing subjects from wide-angle to telephoto perspectives.

Image Quality: Canon's PowerShot cameras generally produce high-quality images suitable for casual photography and social media sharing. While they may not match the image quality of larger-sensor cameras, they offer convenience and ease of use.

Features: The Canon PowerShot V10 would likely include features such as image stabilization, autofocus, scene modes, and possibly manual shooting modes for users who want more control over their photography.

Connectivity: Expect the PowerShot V10 to offer connectivity options such as Wi-Fi and Bluetooth for easy sharing of images and remote camera control via smartphone apps.

Video: Canon PowerShot cameras typically offer video recording capabilities, including Full HD (1080p) or even 4K resolution in some models. The PowerShot V10 would likely support video recording with autofocus and image stabilization features.

Battery Life: Battery life varies depending on usage and features, but Canon PowerShot cameras generally offer decent battery life for a day of shooting, especially with conservative use of features like Wi-Fi and continuous autofocus.

Overall, if Canon were to release a PowerShot V10 model, it would likely cater to users looking for a compact and versatile camera for everyday photography, travel, and casual shooting situations. However, without specific information on this model, it's essential to check for the latest updates and reviews for accurate details on its features and performance.


How To Take Sharper Bird Photos


To capture sharper bird photos, follow these steps:

  1. Use a Fast Shutter Speed: Birds are usually in motion, so a fast shutter speed helps freeze their movement. Aim for a shutter speed of at least 1/500 or faster to ensure sharp images.

  2. Select the Right Autofocus Mode: Use continuous autofocus (AI Servo for Canon or AF-C for Nikon) to track the bird's movement and maintain focus. This mode continuously adjusts focus as the subject moves, ensuring sharpness.

  3. Choose the Correct Focus Point: Select a single focus point or a small group of points to ensure precise focus on the bird's eye, which is crucial for sharpness and conveying emotion in wildlife photography.

  4. Optimize Aperture Settings: While wide apertures (low f-stop numbers) can create a pleasing background blur, they also result in a shallow depth of field. Consider using a slightly higher aperture (e.g., f/5.6 to f/8) to increase depth of field and keep the entire bird in focus.

  5. Stabilize Your Camera: Use a tripod, monopod, or bean bag to stabilize your camera, especially when using long telephoto lenses. This reduces camera shake and helps achieve sharper images, particularly in low-light conditions.

  6. Prefocus on Common Perches: If you're familiar with the bird's behavior and know where it frequently perches, prefocus your lens on those spots. This allows you to react quickly when the bird appears, increasing your chances of capturing a sharp photo.

  7. Anticipate Bird Movement: Birds move quickly and unpredictably, so anticipate their movements and be ready to adjust your composition and focus accordingly. Practice tracking moving subjects to improve your skills.

  8. Use Burst Mode (Continuous Shooting): Birds' movements can be rapid, making it challenging to capture a perfectly sharp image in a single shot. Use burst mode to take a rapid series of shots, increasing your chances of getting a sharp image.

  9. Pay Attention to Lighting: Good lighting is essential for sharp photos. Shoot during the golden hours (early morning or late afternoon) when the light is soft and directional, minimizing harsh shadows and maximizing detail.

  10. Practice Patience and Observation: Wildlife photography requires patience and observation. Spend time studying bird behavior, learning their habits, and positioning yourself strategically to capture the best shots.

By following these tips and practicing regularly, you can improve your skills and capture sharper bird photos. Remember that wildlife photography requires patience, persistence, and a willingness to learn from both successes and failures.


How to focus bird photography?

  How to focus bird photography? Capturing sharp and focused bird photographs requires a combination of proper equipment, technique, and pat...